Create a PWA for your WIX Website for Free
This process is outdated. I have published a much better version of the process, with markedly simpler steps and much less code, here. ( Also I will shut down SmartGoat Blog later and migrate completely to TechWeirdo, sorry for the inconvenience)
Hi, welcome to The SmartGoat Blog. Today we will be creating a fully functional PWA for a WIX website. And it will work form your website domain. It is not very easy. But be assured, if I can do it, you will also be able to. Let’s start.
What Is a PWA and Why use it?
PWA or progressive web app is a fantastic feature to have in most websites. It allows your users to install your website like a native APP in the user’s device. It works inside a browser but acts almost as a standalone app. You can also make pages available when user is offline.
Requirements for any PWA:
- Manifest file: You need to serve a manifest.json file from your website’s url (you will understand later in the post).
- A Logo: To make the site installable you need to serve a logo, at least in 192×192 px or higher resolution.
- Service workers file: For better functionality you can serve a service-workers, but that is not very important. (I will skip it today).
- Valid SSL Certificate: If are using wix you already have it. In general PWA only works when the website has a valid valid SSL certificate.
Things needed to create a PWA for your WIX site:
To make a wix website PWA we need to take some moderately advance steps as it is not supported natively. But don’t worry, I have included plenty of pictures to make it easy for you. And i have provided all the codes necessary. If you still need help feel free to tag us at twitter or threads facebook or Instagram at @smartgoatblog.
List of things you will be needing before you start:
- A CloudFlare account: You need to use Cloudflare as your DNS management service. You can easily migrate to cloudflare DNS from any of your domain manager. BTW you don’t need to change your domain registerer. Just add your site to cloudflare and turn the orange cloud on.
- You need a cloudflare pages website (free)
- You need to run a cloudflare workers script. 1ook operation comes free. But if you have more than 1ook visitors per day, you need to pay.
I will explain last two steps here. For the first step, there is thousands of YouTube videos.
Steps to follow :
Here I am going to convert my wix website www.drsounak.com to a PWA today. You can visit that to check the functionality.
- We will enter into wix website editor, and insert a code at site header to link the manifest.json file.
- Insert another code at the site footer to call the service-worker.js file.
- Create a custom manifest.json file.
- Create a service-worker.js file.
- Publish the manifest.json and service-worker.js file using cloudflare pages or you can use GitHub pages, or any other static html webserver.
- Create a cloudflare-workers script that serves the manifest file under your own domain name. i.e https://yourdomain.com/manifest.json.
- Create another cloudflare-workers script for serving the service-worker file.
- Add routes in your cloudflare domain to route the urls of your manifest and service-workers.
- Test your website PWA.
- Note: To make site installable you don’t need to serve service-workers so step 4 and 6 not needed. But to add offline capabilities, push notifications and all other PWA magics you need to serve service-workers.
- Note: Always give an url to your app icon in the manifest.json file. Otherwise it will not be installable.
Inserting PWA Manifest files’s location at Head section of the Wix site:
First we need to tell the browser that we have a manifest file and a service workers file. So we need to insert some codes in the website.
- Go to you wix Website editor dashboard
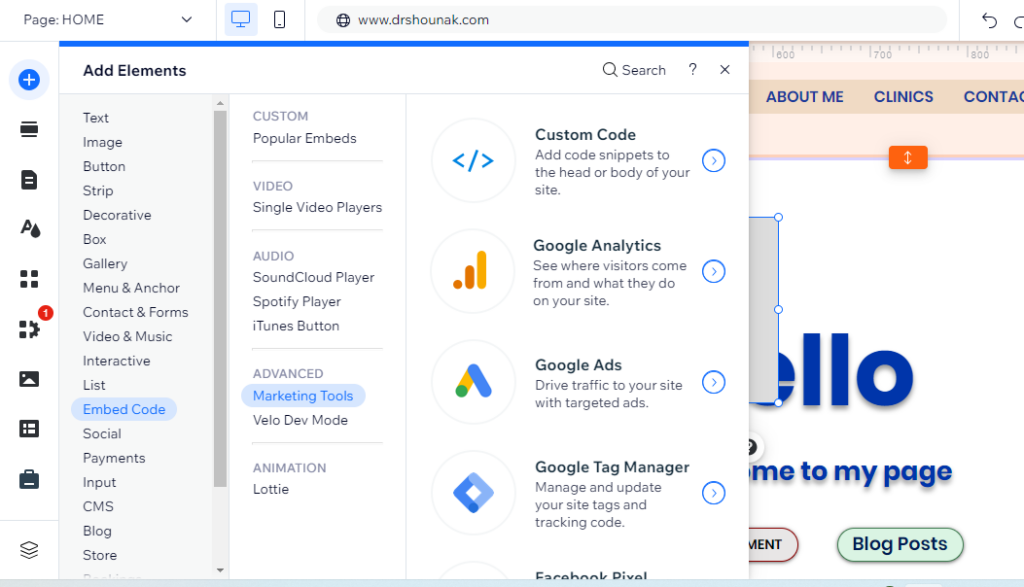
- Go to Add Elements > Embed code > Advanced > Custom code. See the image below.
- You need to insert the code at the head section. See below image and code.
<link rel="manifest" href="manifest.json"/>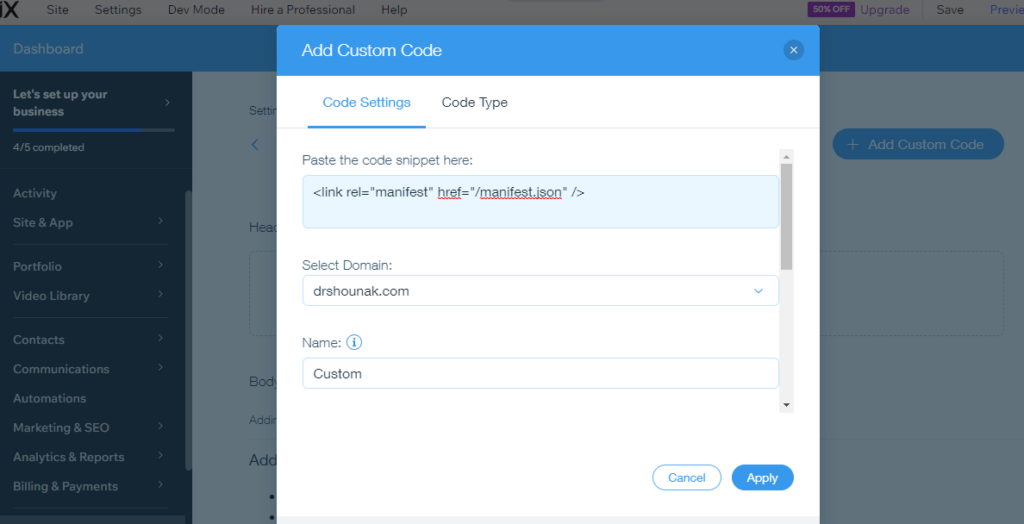
- Now Apply > Publish your site.
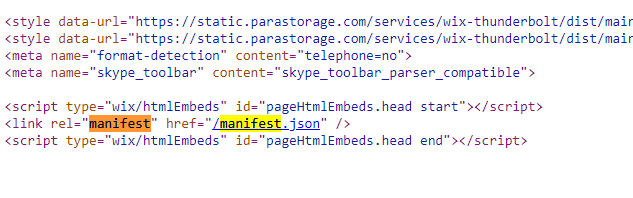
- Check your website if it is working by inspecting the html header (right click and select inspect or view source on a desktop)
Insert code to register the PWA service-worker at the bottom part of the Body of your Wix Site:
This is optional but recomended.
Insert a code at the body of your WIX website. Just follow the above step as inserting manifest.json link in custom code, but this time insert the code inside the body – end.
<script>
if ('serviceWorker' in navigator) {
    navigator.serviceWorker.register('/service-worker.js')
        .then(function(registration) {
            console.log('Service Worker registered with scope:', registration.scope);
        })
        .catch(function(error) {
            console.error('Service Worker registration failed:', error);
        });
}
</script>
Now you are done with wix. Next magic will happen all at cloudflare.
Create the Manifest file
Before that, lets create the required manifest.json file. Here is an example, You should modify it accordingly. You may remove the icon. But that removes the install funtionality. You can add the site to home screen only.
{
  "name": "Name Of Your Website",
  "short_name": "Short name",
  "description": "Describe it",
  "start_url": "/",
  "scope": "/",
  "display": "standalone",
  "background_color": "#ffffff",
  "theme_color": "#317EFB",
  "icons": [
    {
      "src": "insert any image url. You can insert your logo url from your wix website.",
      "sizes": "192x192",
      "type": "image/png"
    }
  ]
}
If you want to serve service-workers to make the site available offline or for some other features. Include the service-worker.js file.
Create the Service-workers file:
A service-worker.js file looks like this (modify this as per your need take help of ChatGPT if needed)
self.addEventListener('install', function(event) {
    event.waitUntil(
        caches.open('my-cache').then(function(cache) {
            return cache.addAll([
                '/',
                '/index.html',
                '/styles.css',
                '/script.js'
                // Add other files you want to cache here
            ]);
        })
    );
});

self.addEventListener('fetch', function(event) {
    event.respondWith(
        caches.match(event.request).then(function(response) {
            return response || fetch(event.request);
        })
    );
});
Now compress the manifest.json file and service-workers.js file into a zip. If you are not using service-workers then compress the manifest file only. This step is needed if you are using cloudflare pages. For GitHub pages you dont need to compress.
Now create a Cloudflare Pages and a Cloudflare Workers:
Hope you are still with me, we are half way there. Now we will be serving the manifest file and service-workers file using cloudflare pages here. And in the next step we will modify their url from a pages url to your website url using CloudFlare Workers.
Create Cloudflare Pages:
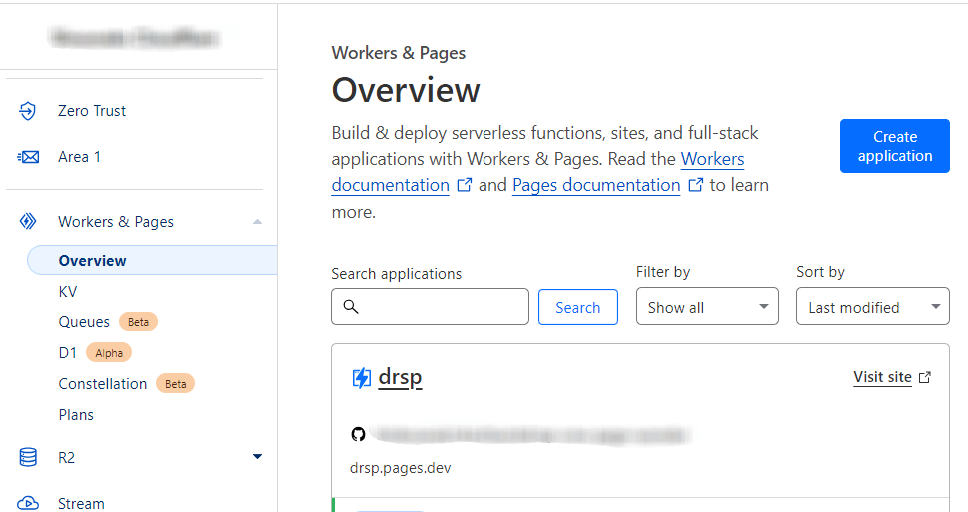
- Go to cloudflare dashboard > Workers & Pages > Create Application > Pages
- Scroll down > Create using direct upload > Give it a nice name
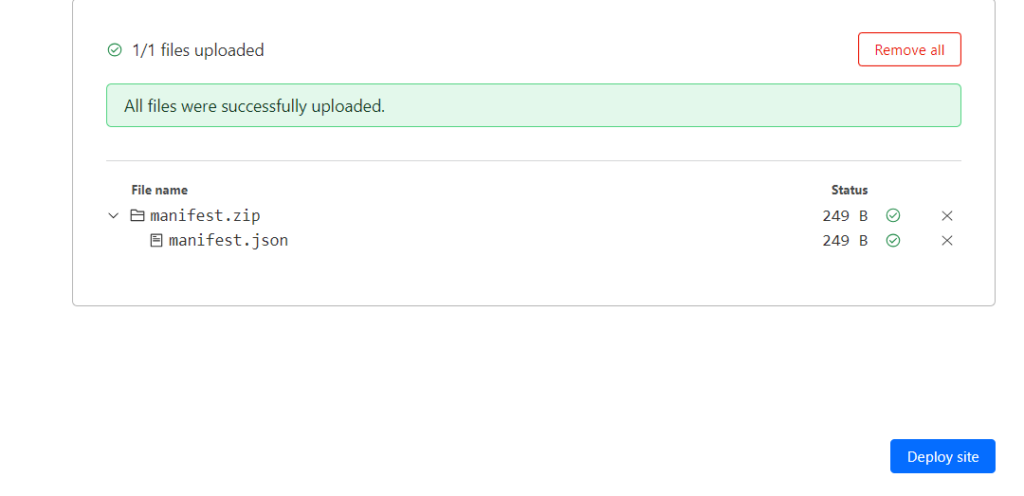
- Drag and drop your manifest.zip file. It should look like this and then deploy the site. Note i have not used a service-workers here, if you have used it, you will see two files.
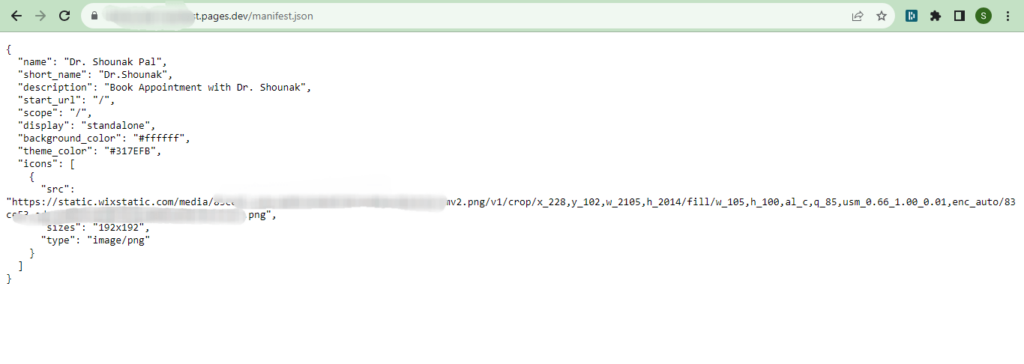
You will get a pages.dev URL after your deployment is successful. Open that and add /manifest.json behind that and you will see your manifest file, and and same goes for your service-workers. We will call this the pages URL.
It looks something like this:
Creating The Cloudflare-Workers to rewrite the URL:
Now the url is getting served from a cloudflare pages url. But for PWA you need to change it to get served from your website url. We will do that with cloudflare workers. Cloudflare workers are serverless functions from cloudflare, and you will get 100,000 workers per day for free. Should be plenty for most, the paid plan is cheap too.
- Create a workers the same way you created a pages but select workers now.
- Give it a nice name.
- Deploy the default workers cloudflare gives you. We will modify it after deployment.
- Go to quick edit and remove the codes there and paste this code from below.
- Modify the line 16 with your website urls and your pages url.
- You need to deploy seperate workers with same codes for manifest and service-workers, just modify the manifest url to service-workers url.
// Listen for every request and respond with our function.
// Note, this will only run on the routes configured in Cloudflare.
addEventListener('fetch', function(event) {
  event.respondWith(handleRequest(event.request))
})

// Our function to handle the response.
async function handleRequest(request) {
  // Only GET requests work with this proxy.
  if (request.method !== 'GET')
  return MethodNotAllowed(request);
  // The URL that is being requested.
  const url = new URL(request.url);
  // Request "origin URL" aka the real blog instead of what was requested.
  // This switches out the absolute URL leaving the relative path unchanged.
  const originUrl = url.toString().replace('https://yourwebsite.com/manifest.json', 'https://your-pageurl.pages.dev/manifest.json');
  // The contents of the origin page.
  const originPage = await fetch(originUrl);
  // Give the response our origin page.
  const newResponse = new Response(originPage.body, originPage); return newResponse;
}

// Hey! GET requests only
function MethodNotAllowed(request) {
  return new Response(`Method ${request.method} not allowed.`, {
    status: 405,
    headers: { 'Allow': 'GET' }
  })
}
Save and deploy your workers and If You preview it, or go to URL of the workers if should show error code: 1042, It is normal.
Now add Routes to redirect the the request to your Cloudflare workers:
So your workers are now serving the manifest and service-workers on your website url, but nobody knows about your workers yet. So we need to tell Cloudflare that if someone request https://yoursite.com/manifest.json don’t send that request to wix server, rather send it to your workers end point, and we will do that by simply adding routes to our workers.
- Add route to your workers: When you go to your workers you will see options like custom domain, routes etc.
- Select view routes > add routes and add your route as shown in the image below, repeate for both the workers.
That is all what we need to do to create a PWA for your WIX website.
If you have followed all the steps correctly you should be able to visit your url/manifest.json and get a response like this. Same will be true for the service-workers.

Check Whether Your PWA is Working or Not:
Go to your mobile web browser like Chrome, Edge, Brave or Safari and search for the install button or add to home screen button. You should see a install pop-up. If you are lucky, you might even get a install notification when you visit your website.