How to host a Ghost Blog completely for Free, Easily on Oracle Cloud with CloudPanel
This is a step-by-step guide to hosting a ghost blog completely for free, easily. With Oracle Cloud free tier and CloudPanel, you are going to get a very powerful Ghost hosting for 0 dollars. But remember although the hosting is free, you have to pay always for a domain name.
Today we will learn how to host a Ghost Blog for Free on Oracle Cloud Easily, and to reduce the complexity of different software and minimize the use of the command line we will be using the free software CloudPanel for our dashboard (here is a demo CloudPanel dashboard). It is almost perfect, for a not-so-tech-savvy person.
Oracle Cloud Free Tier Offerings (more than enough to host a beefy ghost blog):
Services you can use for an unlimited time (as per Oracle)
- Up to 4 instances of ARM Ampere A1 Compute with 3,000 OCPU hours and 18,000 GB hours per month. (so 4 ARM CPU cores, 24 GB total RAM)
- Two AMD Compute VMs (1 Core CPU 1 GB RAM Both)
- 200 GBs of NVMe SSD storage. ( maximum 4 boot vloumes 50GB each, max 200 GB)
- Data egress to all regions up to 10TB( 10,000 GB) per month.
- You can choose any region as your home region during the account setup.
This is an insane amount of always-free computing resources out there.
Pros and Cons of using CloudPanel
Pros:
- Very easy to set up CloudPanel on any server ( beautiful guides available from CloudPanel).
- Easy one-click SSL installation from Let’s Encrypt.
- They support NODE.JS, NGINX, and MySQL out of the box so Ghost will be an easy install. You don’t need to do any server configuration.
- You can install multiple ghost blogs on the same server. ( by just using a different port)
- Other than a ghost blog, you can also install multiple WordPress sites as well as static HTML and PHP, and Python sites all in a single server. It comes in handy more often than not. ( Currently, I am hosting this WordPress blog, another WordPress blog, a ghost blog, and an old ghost version of the blog on the same server.
- Cloud-panel UI is visually very modern and clean. It will come in handy for maintenance and code modifications.
- You will get direct access to the Ghost blog files in CloudPanel UI. It saves a ton of time in the long run and makes minor theme modifications much easier.
Cons:
- You need a server with at least 2 GB of RAM. It is not a problem with Oracle Cloud’s A1 Instances(which we will use). But I can’t install it on the free AMD instance for the 1GB RAM limitation. I have not tried it on Google Cloud. However, for updating Ghost you will require more than 1 GB RAM, I think we will be good to go with the Oracle A1 Instance.
Here are some screenshots of the CloudPanel UI displaying ghost blog files
Let me show you the UI I am talking about.
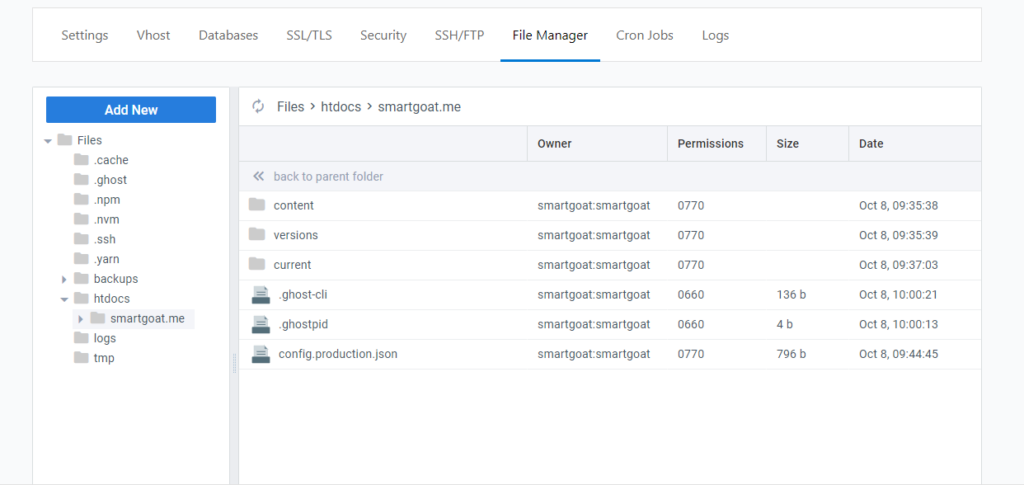
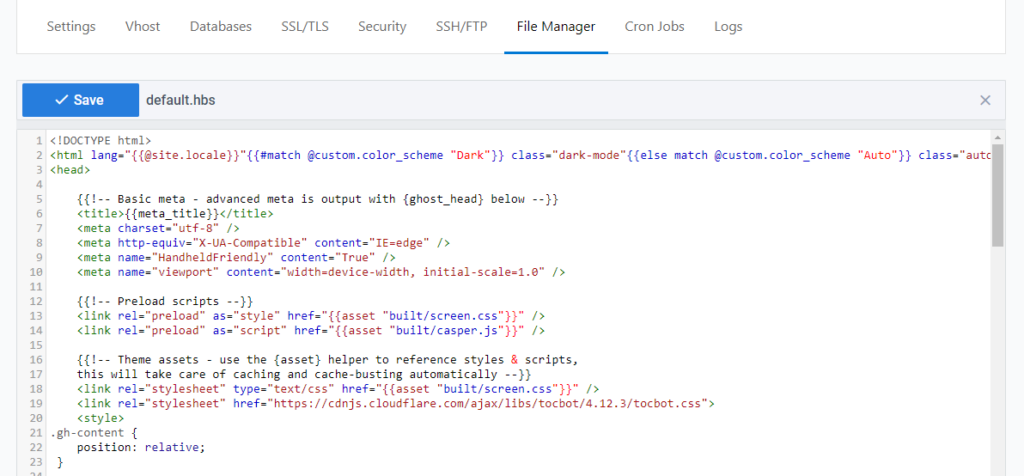
See, I am talking about this beauty. You will not get it even in Ghost Pro. Believe me, you will need this UI, more often than you think. It was my only reason to choose CloudPanel.
Steps to install a free ghost blog:
Steps (Resource added below):
- Create an Oracle Cloud Account
- Create an Oracle free tier account
- Remember to give a correct address (Oracle is very strict)
- Upgrade your account to Pay As You Go. Otherwise, oracle sometimes pauses free tier resources, when underutilized. Also, you will get better availability for A1 compute instances. (Don’t worry you won’t be charged unless you go over the free tier.)
- Create a VM Instance (remember these steps)
- Use Ubuntu LTS minimal with ARM 64
- Use Ampere A1 instance (max 4 core CPU and 24 GB RAM)
- Remember to save the SSH key.
- Add IPv4, for best practice, add it later (by reserving a static IP)
- Don’t Use all 4 cores and 24 GB RAM at once, we don’t need that much computing, so keep some for other projects (like Uptime Kuma). Also, you don’t need 200GB boot storage, keep it default 47GB. You can change it later when needed.
- Connect to the VM using SSH, for Windows users use PUTTY.
- Follow the official CloudPanel documentation to install Cloudpanel
- Install Ghost Blog CMS
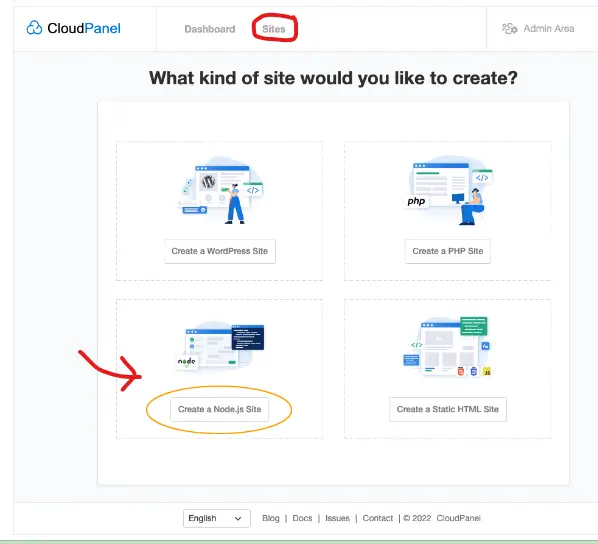
- Go to the CloudPanel dashboard
- Add site, add a NODEjs site
- Always save the site username, password, and database username and password.
- Install Ghost following the below guideline.
- Update your DNS record
- Install SSL using Let’s Encrypt
- Go to yourdomain.com/ghost for Ghost admin
Resources:
- CloudPanel Official Installation Guide for Oracle Cloud
- Here is a Nice Video Demonstrating Account setup, CloudPanel Setup, and SSL setup on Oracle Cloud.
Follow the CloudPanel doc to install Ghost on Oracle Cloud.
If your are using CloudFlare and SSL doesn’t work, then turn off the orange cloud and try again.
Finally, you are ready to install Ghost blog. Don’t worry. By going this CloudPanel way you have already done most of the jobs. You don’t need to manually install Nginx, node.js, MySQL-server etc. And believe me, configuring those is much harder.
Installing Ghost blog On CloudPanel:
Hopefully, you have installed CloudPanel successfully and can access the CloudPanel dashboard. CloudPanel also has an installation guide about Ghost. But it needs a few more additions and explanations and there is no YouTube video out there. So let me explain the steps here.
Steps (Screen captures added below) :
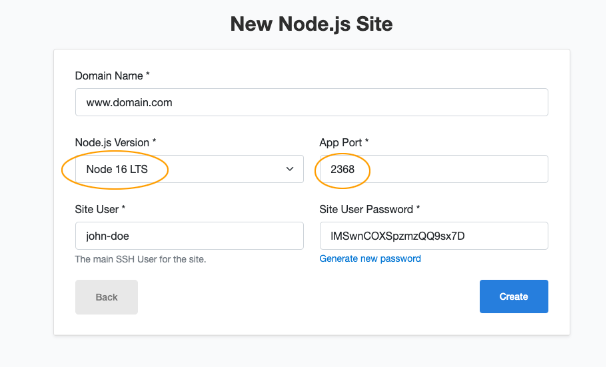
- Click on Add a Site and create a Nodejs site.
- Write down your domain name or subdomain you want to use.
- App-port should be: 2368 (change it for subsequent ghost installations)
- Put your name as the site user and put a site user password.
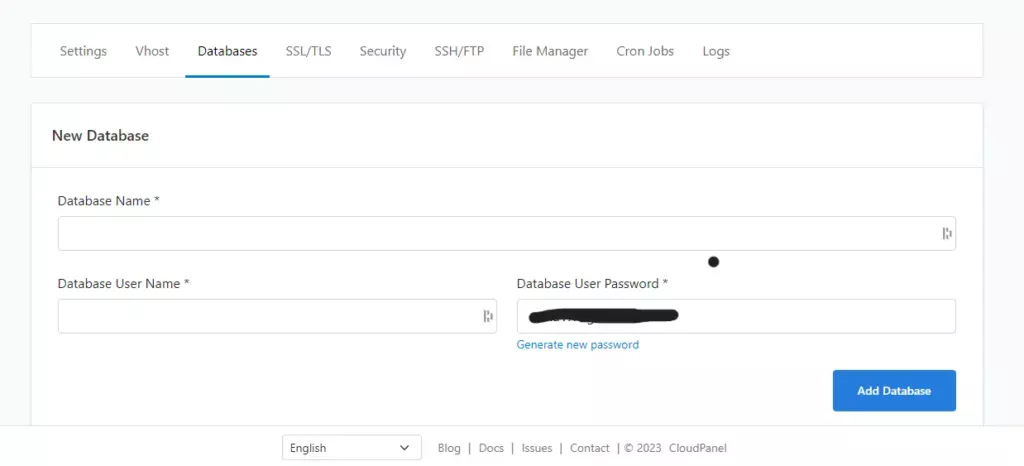
- Go to database and create a database, also create a database user with a password.
Note down your site user name and site user password in the notepad or any note-taking app. You will need it always.
Here is some screen captures of how to do it.
Setup SSL: Now Before moving further go to SSL/TLS > Action > New Let’sEncrypt certificate. It will auto-install your certificate. And again if you kept the orange cloud on at Cloudflare it will cause an error.
After this step, if you are using Cloudflare, go to the Cloudflare DNS dashboard and turn the precious orange cloud on. Also, check that your SSL settings at Cloudflare are set to Full or Strict. Otherwise, you will encounter too many redirect errors.
Now proceed with your free ghost blog installation.
- Now SSH into your VPS using root ( I love putty on Windows)
- Then log in as the site user by typing
sudo su <site user name>- Install Ghost Cli using the npm command
npm install ghost-cli@latest -g- Copy the code in the next box in the notepad change the values starting with $ (including the $ sign) and replace it with the credentials you saved earlier (don’t put $). If you use a different app port (for subsequent ghost installs) change the port to that in the below code.
ghost install --db mysql --port 2368 \
--dbhost 127.0.0.1 \
--dbuser $DATABASE_USER_NAME \
--dbpass $DATABASE_USER_PASSWORD \
--dbname $DATABASE_NAME \
--process local \
--no-setup-linux-user \
--no-setup-ssl \
--no-setup-nginx \
--dir /home/$SITE_USER/htdocs/$DOMAIN/- In the next step when Ghost installation is complete, it will ask you about your blog URL in that place write it like https://www.example.com.
Now you have a functioning Ghost blog at your domain name. Access the admin panel at www.yourdomain.com/ghost/ and create a user ID and password.
Remember that the ghost is installed in a folder and you need to access the folder to update, run, stop, and troubleshoot the ghost instance. To go there SSH into your VPS. Log in to your site user. and then cd into the folder using
cd /home/siteusername/htdocs/sitedomainnameFinal Thoughts
My own setup runs using this method. Use Cloudflare for better speed and performance. I have tested this method up to the ghost 5.76 release on nodejs version 18.
To get a stupid fast performance out of your free ghost blog installation use this Cloudflare caching method. It works.
Note: As you see, it is better if you have some idea about servers in any self-hosted setup. But you will be able to do it. And in the early days of your blog when it does not generate enough revenue it is not a bad idea to self-host a ghost blog. But If your blog becomes cash flow positive you should consider switching to a ghost pro plan. It will give you peace of mind.
You can send monthly 1000 emails for free using mailgun. A server with 4 core CPUs and 24 GB of RAM will be plenty to support a lot of traffic in the long run, so don’t worry. The only concern is how long Oracle is going to provide that server for free. But when you have large enough traffic you do not want to play with your server up-time and lose traffic.
Anyways if you are starting a blog, go with this free installation. And start expressing yourself. Ghost is a fantastic platform for blogging. But if you find self hosting heard, here is a list of all the useful ways you can host a Ghost Blog.
I will be learning ghost for the next few days and will be writing a follow-up post taking this ghost installation to crazy fast with proper CDN. Today It is already long enough. And I will try my best to keep this post updated.
Thanks for reading this far, I hope this was helpful. Consider sharing this post in social medias if you find it helpful.