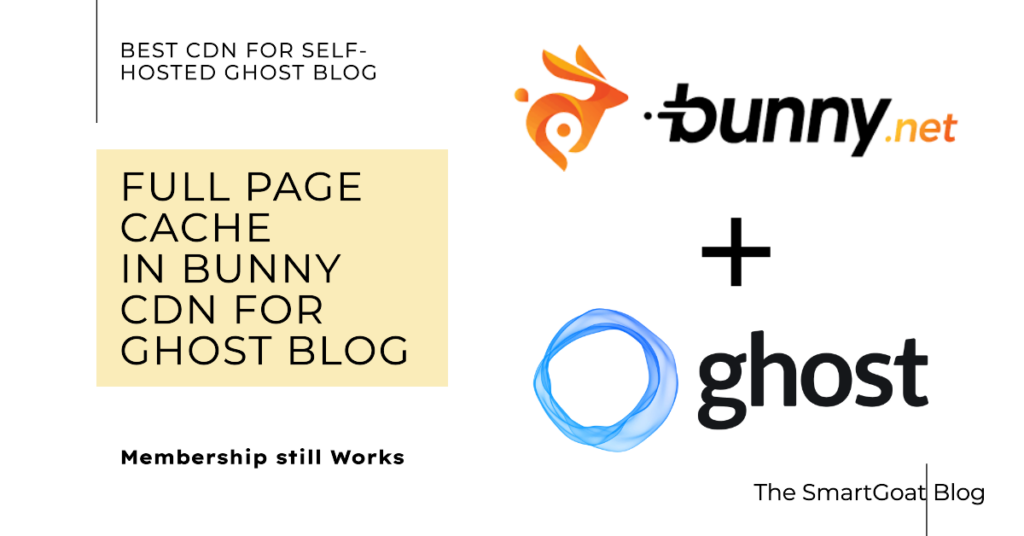
The Best method to integrate Bunny CDN with Ghost Blog Easily under 10 minutes.
In this post, I am going to show you the easiest and the best method to integrate Bunny CDN with your Ghost Blog. Bunny is one of the best CDNs for Ghost blogs. In this method, you do not need to do any code modifications, subdomain creation, or other complex things. But the benefit will be huge, as you will be serving you whole blog i.e. static assets like CSS, JS, and dynamic HTML from your CDN. Which will massively reduce your TTFB across the globe improving your speed, and reduce the load on your server by huge margin.
Here your Ghost Blog will enjoy the benefits of a static site, without you changing the way how you publish your blogs. Also, any user who is a member and logged in will bypass the edge cache and will receive the member-specific features normally. But all other visitors will be served everything from the CDN completely bypassing your origin server.
Jump to How we are doing Full Page cache at Bunny CDN.
Now if you read my previous blog, I did the same thing with Cloudflare CDN. Which was not easy but completely free. Here, you need to spend a minimum of 1 dollar/month, but it is much easier and more performant.
Note: If most of your visitors visit your site, while logged in, please modify the below steps accordingly. In that case, use Bunny or Cloudflare as a reverse Proxy caching CDN i.e. do dynamic cache in Cloudflare. Or use Bunny as a Reverse Proxy by using Smart Cache(step 4), and don’t use Edge Cache (step 5). Because, in the method below, images, CSS, and JS all get bypassed for logged-in users. In reverse proxy mode bunny offers a superior connection than Cloudflare check the result.
How to enable Full Page Cache for a Ghost Blog in Bunny CDN
Step 1: Create a Bunny CDN account
If you are new to Bunny then Join Bunny CDN here, (you will get a 14-day free trial) after that. They charge 1 dollar/month minimum, but their cost is very cheap (0.01 dollars/GB for North America and Europe). After signup, go to your Bunny dashboard.
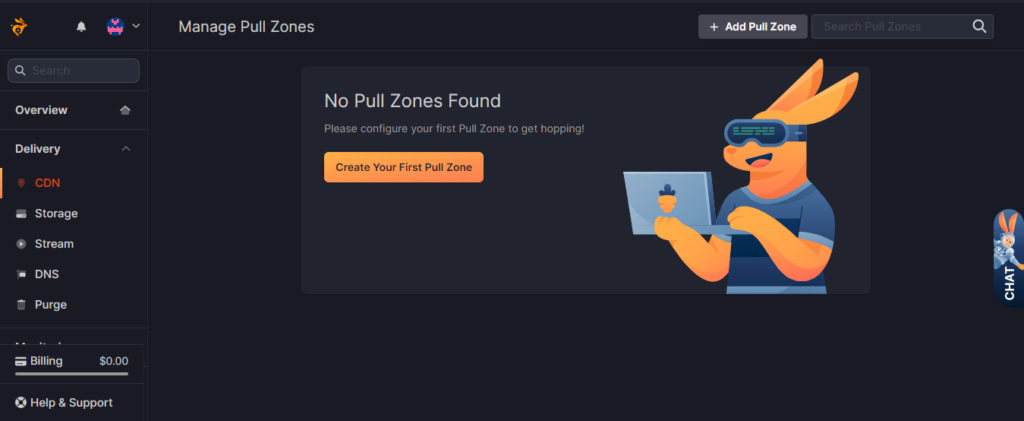
Step 2: Creating a Pull Zone
First, in your Bunny Dashboard go to CDN > Add pull zone
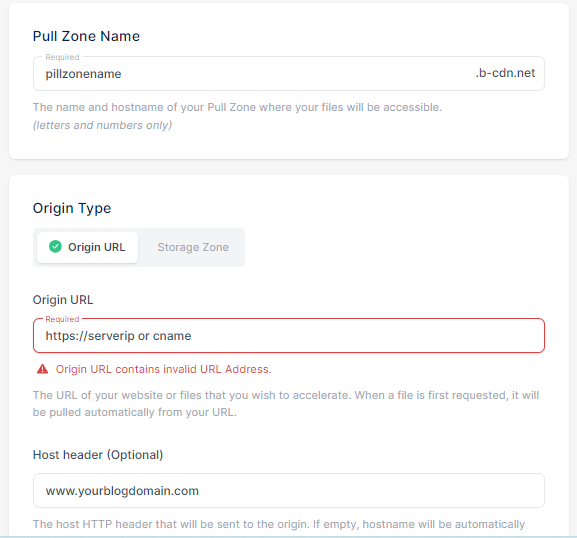
Give your Pull zone a nice unique nameIf your website is behind a proxy, i.e. multiple websites on the same server, then insert your server IP address like https://192.168.1.1, or if you have a CNAME from your hosting provider then enter that. when using IP don’t forget to add your blog’s domain name in the host header option.Select your tier ( Standard Tier is better) and disable Zones if you want to.
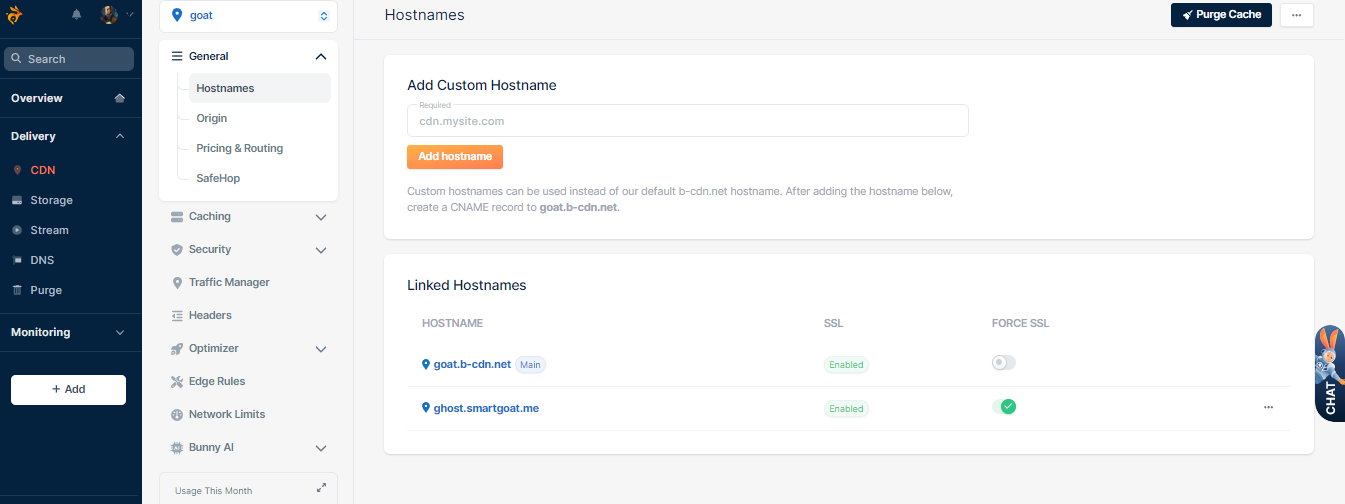
Step 3: Add your blog’s domain name as the custom hostname
On the next page, you will see a domain name with “pullzone.b-cdn.net”. Add your blog domain name as the custom hostname. Now don’t verify, or change DNS yet. Will finish the rest in step 6 and step 7. Let’s complete the caching part in Bunny first.
Step 4: Configuring Cache Behaviour
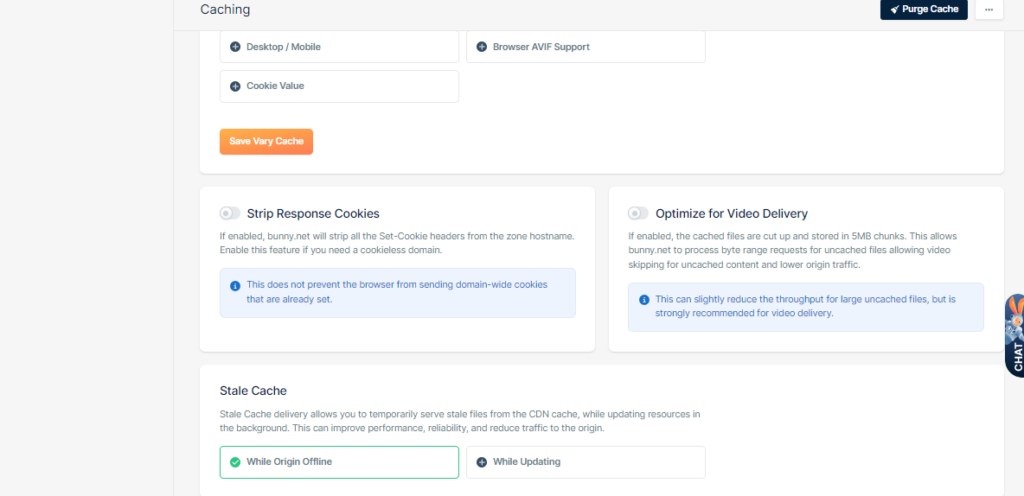
Go to the Caching drop-down menu > General.
- Keep Smart Cache OFF
- Cache expiration time: 1 year ( After new content you need to purge anyway, so higher is better IMO)
- Turn on the query string short
- Go below and turn off “Strip Response Cookies“
- Stale cache: While the origin is offline ( Keep your site UP, even if your origin server is down)
Now go to
- Turn Origin Shield on.
- Change Between Paris and Chicago depending on which is closer to your origin server, by clicking the Green dots on the map.
See the below images.

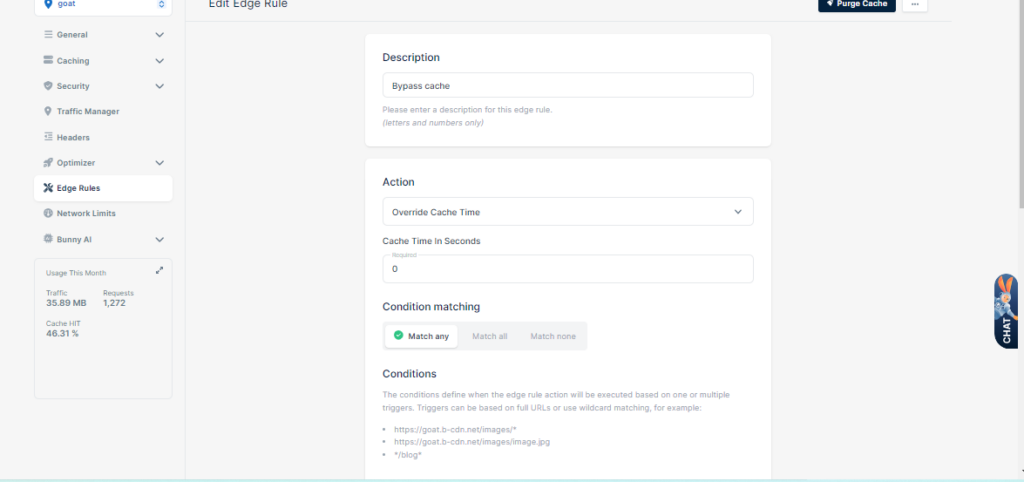
Step 5: Configure EDGE rules
Now we can not cache everything for everyone. So we need to bypass the cache for our beloved members and admins. To do that we will implement 2 edge rules. See the below images and read them carefully. This is most important to bypass all ghost admin dashboards and member areas.
Description: Bypass cache
In Action tab:
- Override Cache time
- Cache time 0
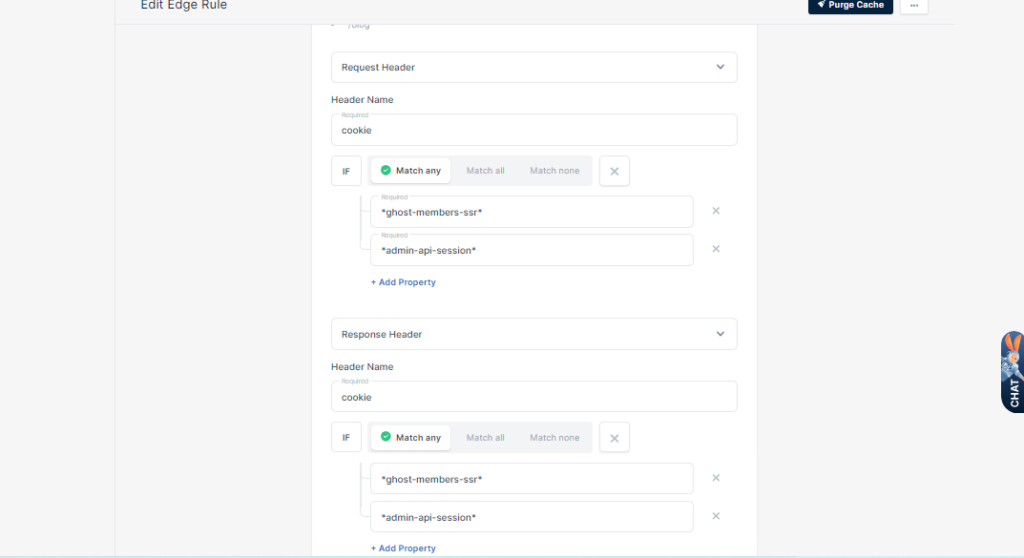
In Conditions:
- Request HeaderHeader
- name: cookie (All lowercase)
- Match Any
- cookies are “ *ghost-members-ssr* ” and “ *admin-api-session* “ [ Those * are necessary, see i
Publish edge rules. You do not need to bypass any URLs, all get bypassed automatically, due to the cookies.
Step 6: Update your DNS records.
Now go to your DNS provider, i.e. your domain name registrar or Cloudflare – whatever you are using. You probably have an A record with IP pointing to your server or a CNAME record pointing to your host with your blog domain. Remove those existing records, and create a new CNAME record for your blog’s domain pointing to that b-cdn.net domain in the first step at the Hostname tab.
Please turn off Cloudflare Proxy (i.e. the orange cloud), if you use Cloudflare for DNS.
Step 7: Add SSL
Go to your Bunny Tab. If you have added your blog domain there, then just click on enable SSL, and verify. Or add your blog domain as a custom domain.
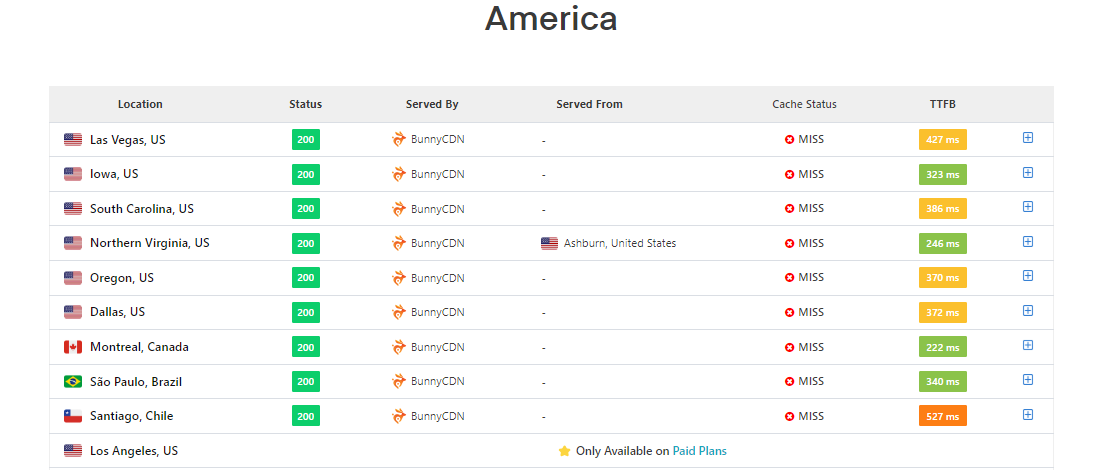
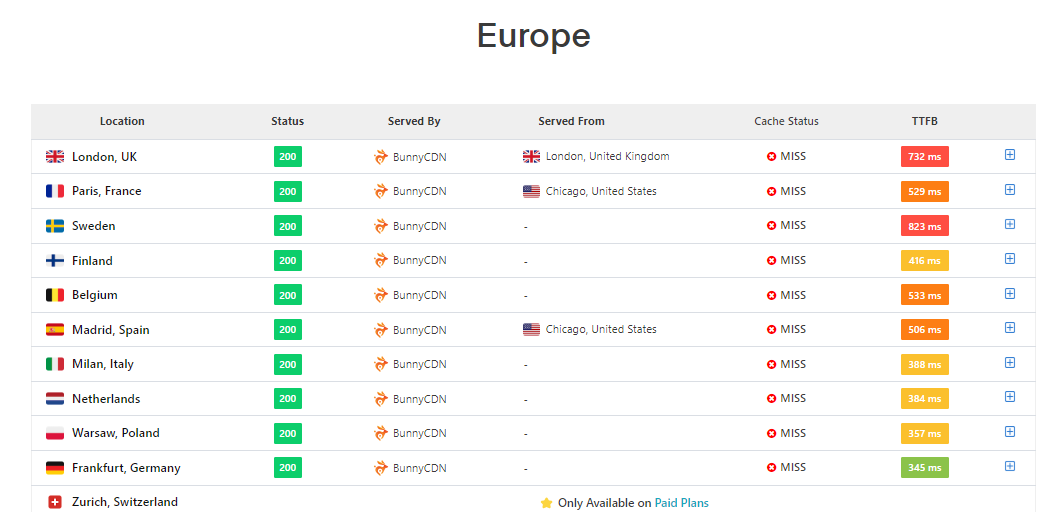
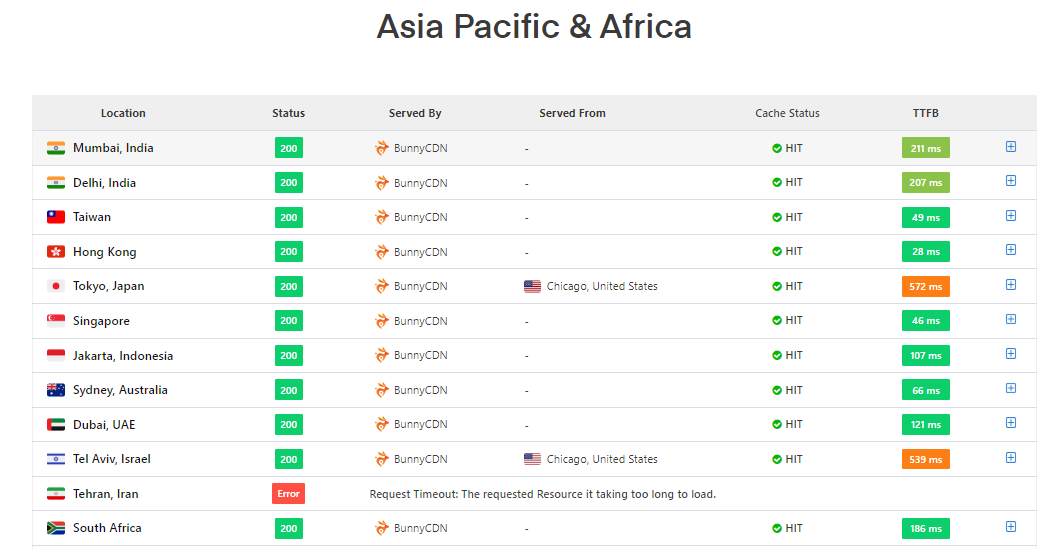
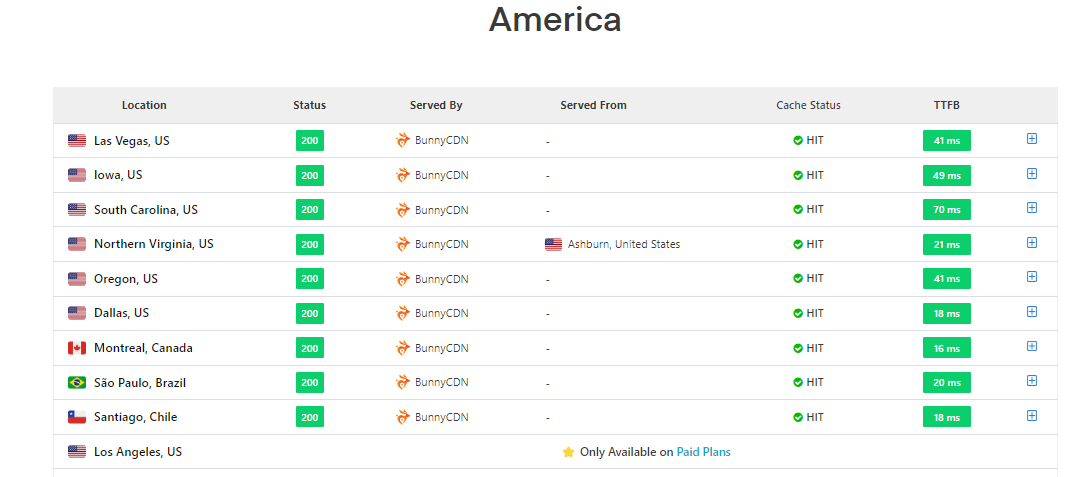
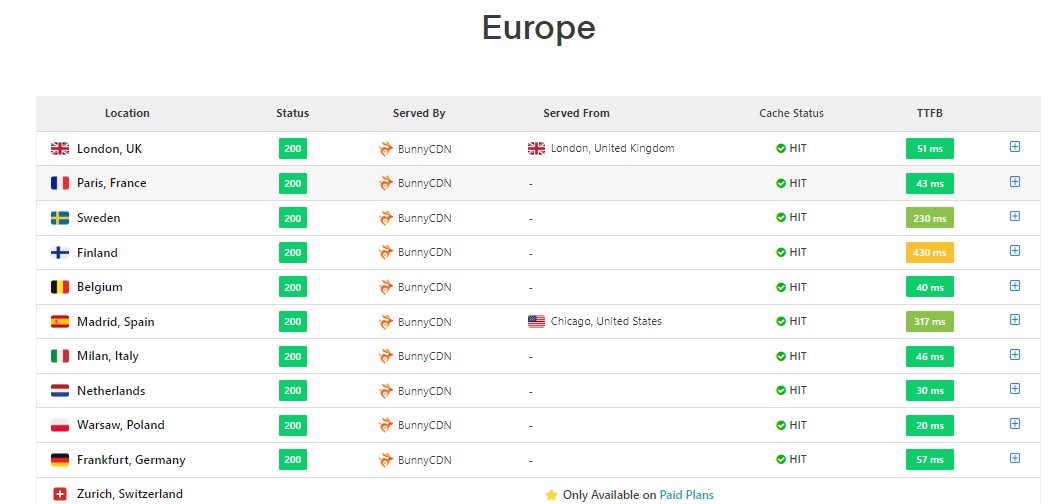
That’s it. Now verify if member signup is working or not if your blog is getting cached or not, and check the global caching status using TTFB checker. Also, check if the Admin page and member pages getting cached or not in incognito mode. It should work normally.
Read more about Ghost Blogs


Why Choose Bunny over Cloudflare:
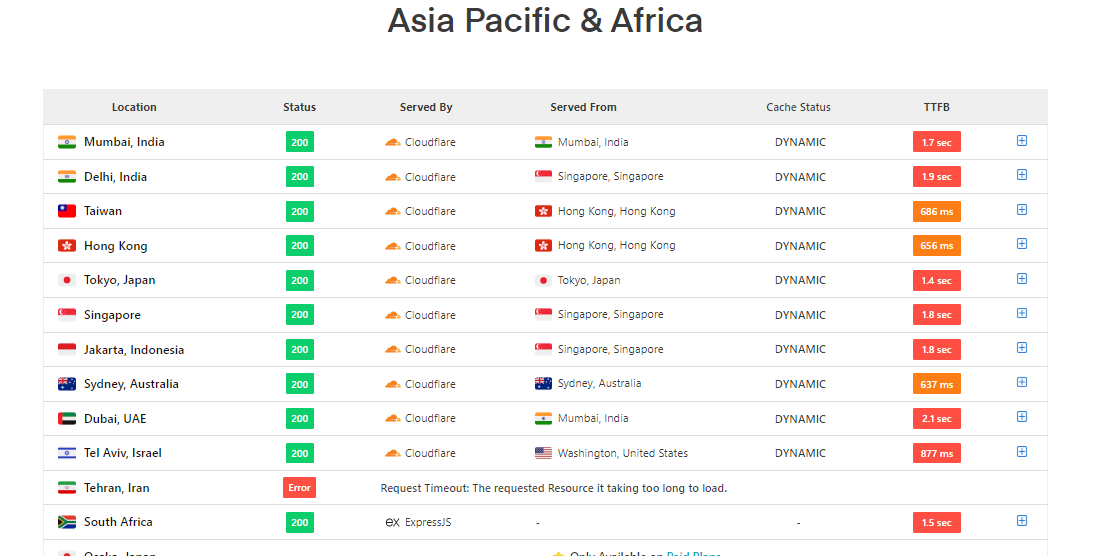
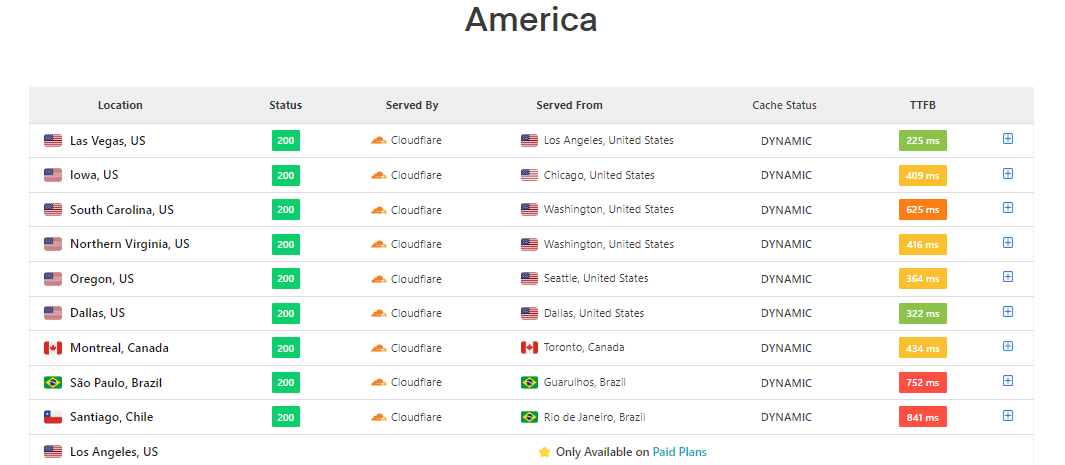
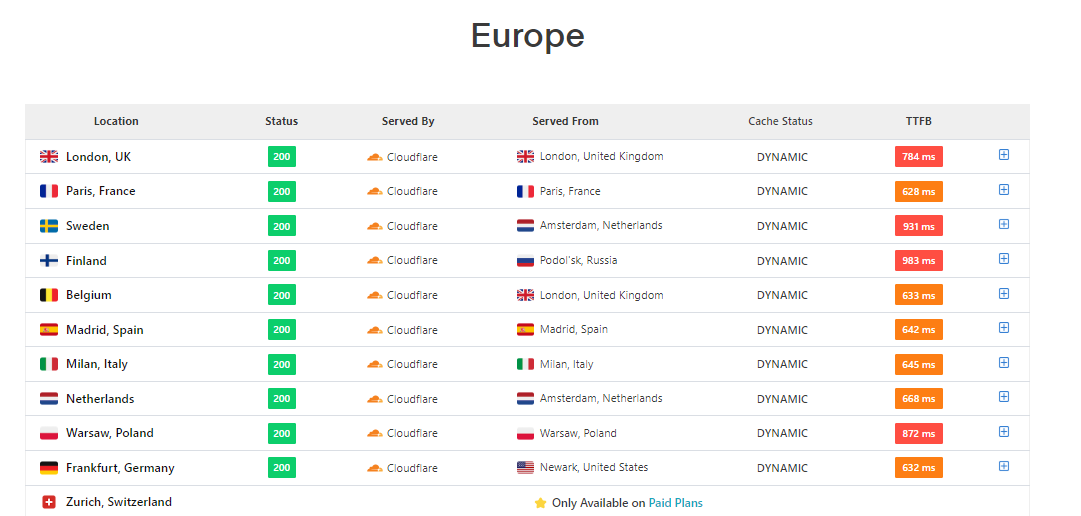
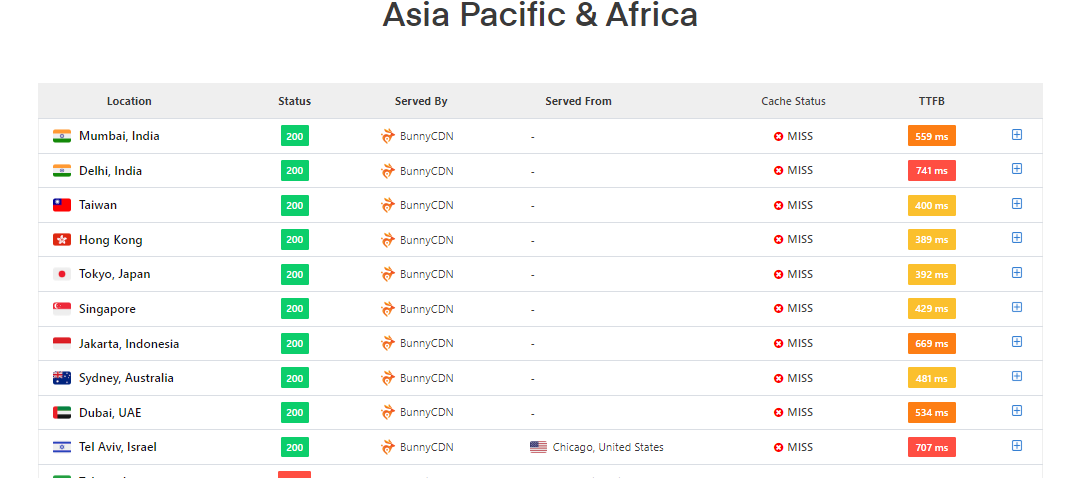
- In my testing, Cloudflare offers poorer routing than Bunny CDN, especially in the Asia Pacific (APAC) region. (Cloudflare premium CDN network, i.e. Agro costs 5bucks+0.10 dollars/GB which solves the problem). Bunny is way cheaper than that and performed better.
- No code is required. At Cloudflare you required a worker script, also it was limited, depending on the number of requests per page, you could get 1000-5000 page views per day for free. (In my testing)
- Cloudflare clears cache more frequently, and more POP means fewer users per POP so, yes, the chance of hitting cache in a nearby datacenter is much less (cache hit from distance DC means slower response). Bunny stores cache for much longer, so better for low-traffic websites.
Check the test result yourself here. But yes, there are many reasons to stay at Cloudflare too. But that will be your decision.
Conclusion
Ghost is already fast but with this method. we can make it much faster, by reducing the physical distance the html needs to travel. This also bypasses your server for logged-out users. So you can spend much less money on your server specs and bandwidth or even go with a free tier one. Hope you have found this guide helpful. This is not sponsored by Bunny CDN, Cloudflare and Bunny are the only two CDNs I can do this trick so far. If you like this post use my Bunny referral code, you won’t get anything extra, but I will get a small credit, which helps in testing different things. This article is originally published in The SmartGoat Blog.
Related Topics:
- Where to host Ghost Blog reliably From free self-hosting to Managed Pro options in 2024
- How to host a Ghost Blog completely for Free, Easily on Oracle Cloud with CloudPanel
- Free tier VPS and Cloud Instances that actually Work for FREE and Good in 2024
- How to migrate a blog from Ghost to WordPress for free. Here is my experience
Cloudflare CDN VS Bunny CDN ( Reverse Proxy Mode) The Same difference can be seen in Full Page cache mode too.