
Purge Cloudflare Cache Without visiting Dashboard – URL-Based Method
Cloudflare is one of the most popular CDN services used by more than 20% of the websites. Being a CDN Cloudflare efficiently caches contents varying on the user settings. One can setup dynamic cache to Full Page Cache. But every time we update our website we have to purge the Cloudflare cache so that the contents gets updated. Usually we go to the Cloudflare Dashboard and purge the cache. But that is time consuming. So let’s create a streamline procedure to purge the cache so that when we will visit one specific URL the Full Cloudflare cache will be purged. Additionally I will show you how to automate Cloudflare cache purging in a Ghost Blog below.
Overview of What We are going to do
We will be deploying a Cloudflare workers Script. I have given all the required codes below. That Cloudflare script when triggered will purge the full-cache of your website from Cloudflare.
To achieve this we need:
- Cloudflare workers
- Your domains Zone id (explained below)
- Your API key (also explained below)
- Your Cloudflare email address
⚙️ After deploying the workers script we will get a workers URL like https://example.yoursubdomain.workers.dev you just need to add /purge-full-cache behind that so the full domain becomes https://example.yoursubdomain.workers.dev/purge-full-cache.
Every time you visit the URL your cache will get purged. Bookmark the URL in your browser and you are good to go.
Deploying the Cache purging Solution
Hopefully I have given you a rough idea about what we are going to do in this tutorial. So lets begin.
Getting the Required credentials
First let’s collect all the required credentials we are going to need for this operation.
1. Zone ID: Cloudflare calls every sites a zone**.** To get the zone ID, go to your Cloudflare dashboard and select the website you want to deploy the cache purging function for. On the overview page in right side go below domain registration and active subscription, you will find the API area. There you will see the zone id. For details see the below image. Copy and paste it in notepad.
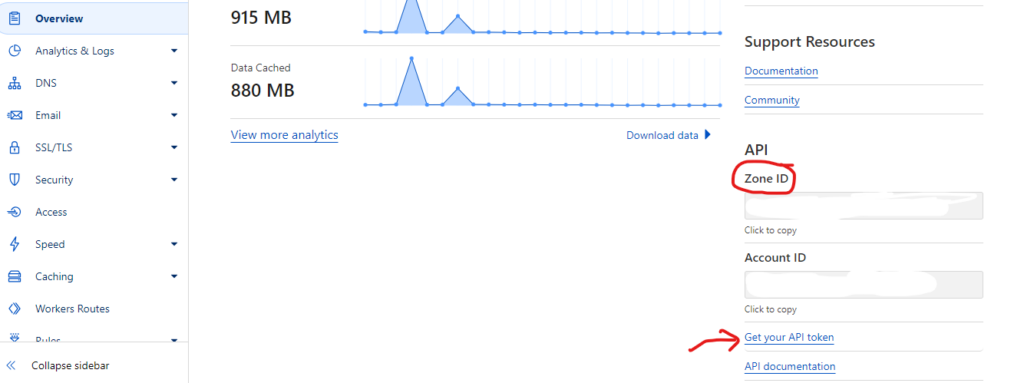
2. API key: At the same place you find “get your API token”, click that. Go to create token, and below you will find “Global API Key”. Use that as your API token.
Deploying the Cloudflare Workers
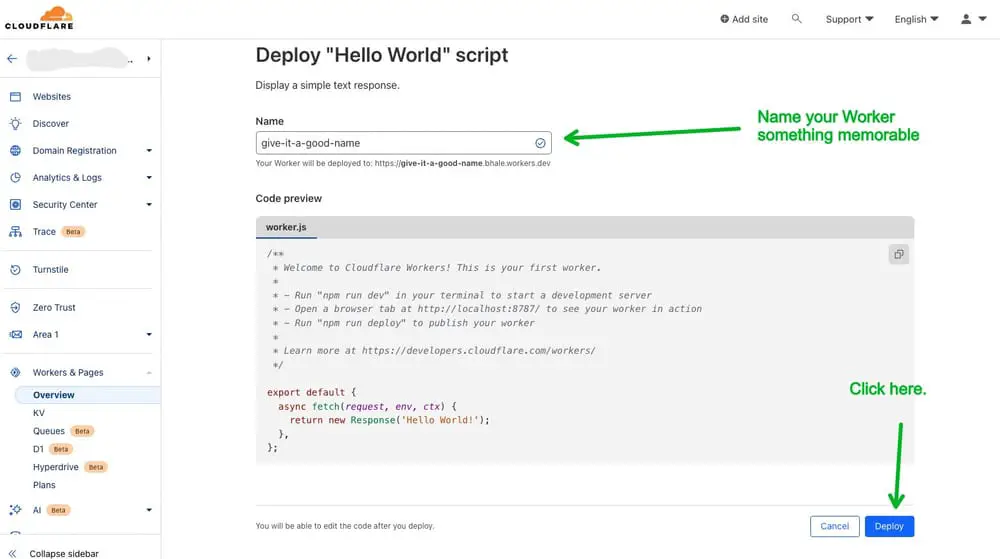
1. Create a Cloudflare Workers: Go to your Cloudflare dashboard > Workers and Pages > Create Application > Create Worker > Now you will see a worker script, change a suiting name and hit deploy.
We can change the code post deployment only. Then go to edit code and clear the existing worker.js script. It will look the like below images.
Now what code is needed? Copy the below codes and modify the input fields with your credentials. Then paste in in the worker.js field and hit “save and deploy”.
Replace “YOUR_ZONE_ID” ‘YOUR_EMAIL’ and ‘YOUR_API_KEY’ with the values you saved in your notepad.
addEventListener('fetch', event => {
  event.respondWith(handleRequest(event.request));
});

async function handleRequest(request) {
  const { pathname } = new URL(request.url);

  // Check if the request is to trigger full cache purge
  if (pathname === '/purge-full-cache') {
    // Purge the entire Cloudflare cache
    const purgeResponse = await fetch(`https://api.cloudflare.com/client/v4/zones/YOUR_ZONE_ID/purge_cache/`, {
      method: 'POST',
      headers: {
        'X-Auth-Email': 'YOUR_EMAIL',
        'X-Auth-Key': 'YOUR_API_KEY',
        'Content-Type': 'application/json',
      },
      body: JSON.stringify({ purge_everything: true }),
    });

    if (purgeResponse.ok) {
      return new Response('Full cache purge initiated successfully.');
    } else {
      return new Response('Failed to initiate full cache purge.', { status: 500 });
    }
  }

  // Handle other requests here if needed
  return new Response('Not Found', { status: 404 });
}
Using the Workers URL to Purge Cloudflare Cache
That is it. Now you got a workers URL like this- https://example.yoursubdomain.workers.dev/. And when you add /purge-full-cache behind it like https://example.yoursubdomain.workers.dev/purge-full-cache your full cache for that zone (website) will be purged. Save the URL as a bookmark in your browser and you are ready to go.
If you have a Ghost Blog and want to automatically purge the cache when you Publish a new post or a page follow below instruction.
Ghost Blog Automation to Purge Cache
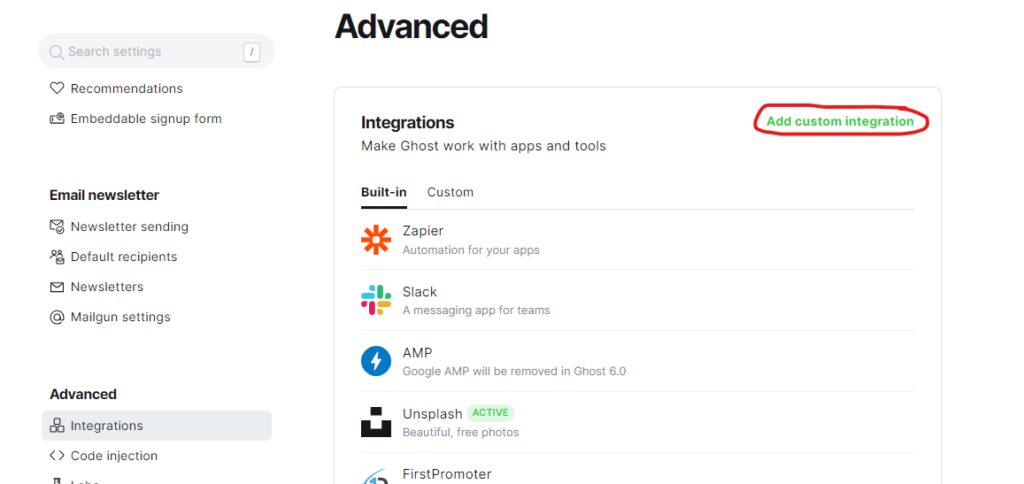
If you have a Ghost blog you can add further automation so that when you update something on your site it will automatically purge the Cloudflare cache. To achieve this go to your Ghost Admin page.
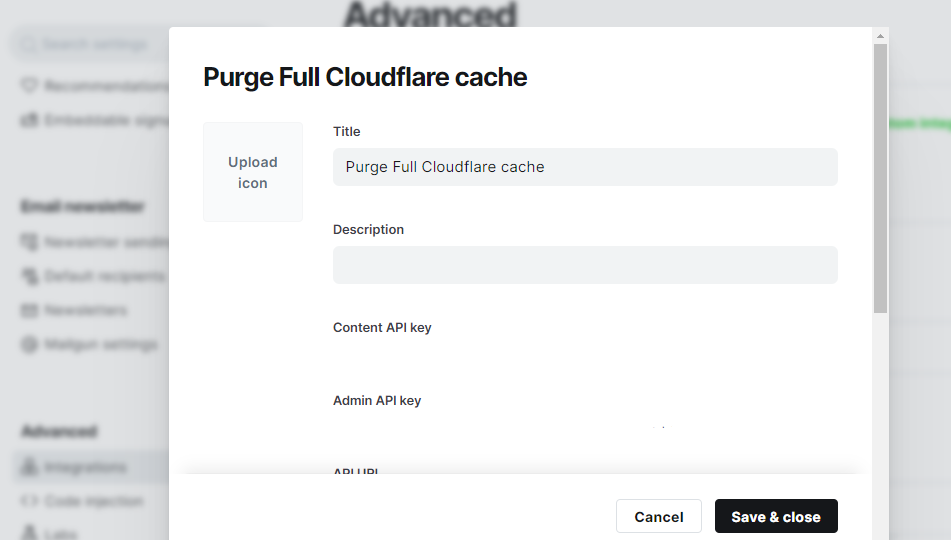
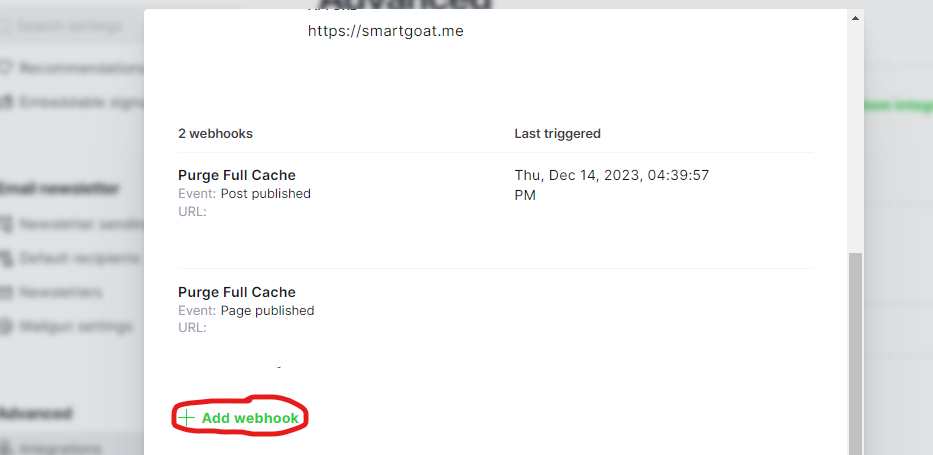
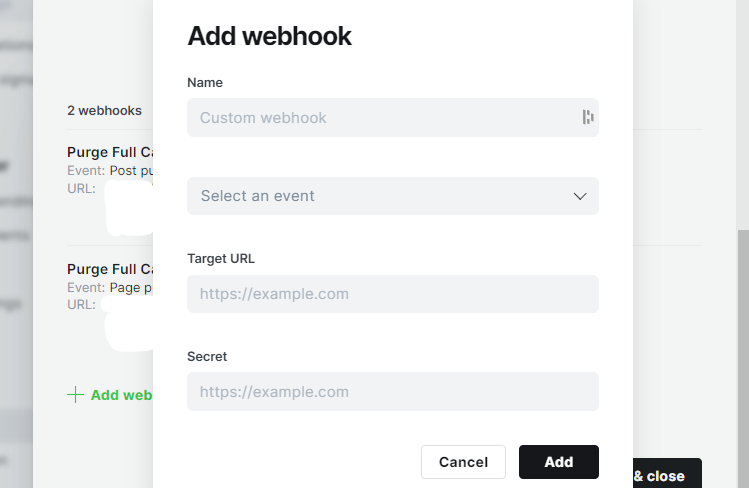
In the admin page go to Settings > Integration > Add Custom Integration > Give it a nice name &add > Set a title > below you will find “add webhook” > Give it a name > At Target URL paste your workers URL with “purge-full-cache” extension in the URL > Select an Event > Add and Save.
Follow images below for further clarifications.
🆘 Note: Regarding “Selecting Event” You can set it to “Site-Changed”. It will purge cache every time something happens. I don’t use that. I created 4 separate webhooks with same settings, except for event I used ‘ Post Published’, ‘Post Updated’, ‘Page Published’, ‘Page Updated’. It does not purge cache for minor reasons. But Occasionally if I change themes I just use the workers URL directly from the bookmark.
Conclusion
That’s it for today. Hope you have successfully deployed it. For any questions ping me on Twitter. If you want to self-host a ghost blog for yourself or thinking about migrating from WordPress to Ghost, here is my post about ghost setup, or you can use DigitalOcean one click deploy. You can get free DigitalOcean credit here.
Thank you for reading The SmartGoat Blog. If you like it, please share this post in social-medias or with friends. Have a nice day.


Not working for me. Not sure if I somehow missed a step. I get an “Failed to initiate full cache purge.” when I run this.
Hi, thanks for pointing out. It was working previously. But I checked now and it was not. Here is the updates https://api.cloudflare.com/client/v4/zones/YOUR_ZONE_ID/purge_cache/ add ending / at the end of the url and at the place of api key use your global key, instead of creating a custom one. It is probably not getting the account details from the current api key. You can find the global api key at the api page itself. As global key